Showing posts with label Breakfast Recipes. Show all posts

Saturday, 29 October 2016

RECIPE | POTATO OMELETTE


This is a childhood recipe taught by my late grandmother. She was a pretty amazing cook and taught me a couple recipes that are so simple and unforgettable, like this easy yet filling Potato Omelette. It's so simple and only consists of five ingredients (3 if you don't count salt and pepper)! The crispy diced potatoes combined with the softness of the egg make this a great breakfast dish. For top flavour, I use free-range organic eggs by Burnbrae Farms. I find that there eggs have a wonderful sweetness to them I can't describe. That sweet taste originates from the fact that free-range organic chickens live happier and healthier lives so their offspring also benefit from that too.

Step 1: INGREDIENTS


SERVES 1 | PREP TIME 5 MINS | COOK TIME 12 MINS

2 EGGS SCRAMBLED (OPT FOR FREE-RANGE ORGANIC)
1 MEDIUM POTATO PEELED
1 TBSP OF EXTRA VIRGIN OLIVE OIL
SALT AND PEPPER TO TASTE

Step 2: INSTRUCTIONS


Prepare your ingredients as listed above. Small dice your potatoes (1 cm x 1 cm approximately).
In a small deep non-stick pan set on medium heat, pour in the olive oil. Then add your potatoes. Season with salt and pepper. Cover with a lid and allow this to fry until golden brown or for 7 minutes. Flip them every now and again.
Once potatoes are browned, pour in the scrambled eggs. Allow the eggs to coat potatoes evenly. Cover with a lid for 2-3 minutes.
Flip your omelette and cook on the other side for 1 minute.

Tip: To flip the whole omelette while keeping a perfect circle, cover the pan with a larger serving plate. Then flip the whole pan over while holding the plate underneath it so that the egg can drop on the plate. Then place pan back on stove top, slide the egg from the plate back onto the pan to fry the other side.

Serve with some ketchup or some chopped herbs. Enjoy!

How to Make Milk-free, Corn-free, and Gluten-free Pumpkin Spice Muffins

Being allergic to all milk, corn, and gluten I constantly have to make up recipes and alter them to my food allergies. This is a recipe that I’ve altered and created for this fall that I make all the time at
home. I’ve had my family try these and they say that they are pretty darn good!
Ingredients You'll Need:

1 ¾ cups of Bob’s Red Mill All Purpose Baking Flour (Wheat, Corn, and Dairy Free)

1 cup granulated sugar

½ cup brown sugar {light or dark}

1 teaspoon baking soda

½ teaspoon salt

2 teaspoons ground cinnamon

¼ teaspoon ground cloves

¼ teaspoon ground nutmeg

½ teaspoon of pumpkin pie spice {optional}

2 large eggs

1 {15 oz} can pure pumpkin puree

½ cup coconut oil, melted

1 tablespoon soy milk

1 cup or more of Walnuts {optional}
Materials You'll Need:

Measuring Cups: 1 cup, ¼ cup, ½ cup

Measuring Spoons: ½ teaspoon, 1 teaspoon, ¼ teaspoon

Mixer with 5-Qt. Tilt-Head Coated Flat Beater and Bowl {Any sort of a general beater should work}

Muffin Tins {Size is up to preference}

Muffin Liners {Size is up to preference}

Rubber Spatula

Knife

Large Spoon

Can Opener

Oven {set to Bake at 375°}

Coconut Oil Cooking Spray

Small Bowl
SAFETY PRECAUTIONS:
Being that this whole recipe is about being corn, milk, and gluten free you want to make sure that all ingredients are in fact free of all those food allergies.
Step 1:


Preheat the oven to 375°

Step 2:

Line a muffin tin with muffin liners and grease with Coconut Oil Cooking Spray. Set aside.

Step 3:


In the mixer combine all of the dry ingredients (the flour, granulated sugar, brown sugar, baking soda, salt, ground cinnamon, ground cloves, ground nutmeg, pumpkin pie spice {optional}, walnuts {optional}) Stir for a couple seconds.

Step 4:


In a small bowl combine all of the wet ingredients (2 large eggs, {15 oz.} can pure pumpkin puree, melted coconut oil, soy milk). Stir well.

Step 5:


Combine the small bowl of wet ingredients in the mixer bowl. Beat together well until all ingredients are well combined. If needed scrape the side of the bowl with the rubber spatula to get the leftover ingredients down to the rest of the mix.

Step 6:

Take the lined muffin tin and set near the bowl. Using the large spoon scoop out a spoonful of mix and put into one of the muffin liners. Fill the muffin liners until they are about ⅔ of the way full. Repeat with each of the muffin liners. Usually makes about 12-16 muffins.

Step 7:


Put into the oven and bake for 22-24 minutes
Step 8:


Using a knife or a toothpick insert into one of the muffins to test if it is done enough. Once they are deemed ready serve or put into a bag or tupperware in the fridge for later. Enjoy!

Monday, 24 October 2016

COCONUT MILK MOI MOI WITH TUNA CHUNKS

The combination of coconut milk with tuna chunks in Nigerian moi moi is something we need right now. Good nutrition. We have moi moi recipes on the blogalready and if you think there's no need for this, then try it and see yourself cooking moi moi daily because

you cannot resist this. Moi moi cooked with coconut milk and and tuna chunks is so delicious we all have just overfed ourselves. I could not stop after one wrap, had to open another.

When I posted the pictures of this brown coconut moi moi initially, I knew that you guys might not try cooking that because of the colour and even me sef, with all the delicious taste, I still had to give it away because that colour wasn't really inviting. Cooking this, I made sure I removed all the beans skin so the colour doesn't turn dark again. You know what? These days making moi moi has become really easy because we don't have to scrub and pound to skin the beans. With a food processor or blender, beans skin can be removed in seconds. I used a food processor here and in less than a minute beans washing was done with. Moi moi and akara lovers can eat their delicacies daily now as beans skinning is no longer a difficult task.
Don't we all just love this coconut milk moi moi? If you want the colour very red, add more tatashe.


A serving of coconut milk moi moi


Some ingredients, tatashey and onion waiting to be chopped, tuna, bouillon seasoning cubes

INGREDIENTS:
3 cups (half mudu) beans
two table spoons oil (optional) because coconut milk contains coconut oil.
3 medium sized onion
5 large tatashey ( red bell peppers)
2 bouillon cubes
2 cans tuna chunks. You can use corned beef if you like.
1/2 can coconut milk. You can use more or less depending on how hard or soft you want your moi moi. The ground beans looked like there was some water in there already so, I used just half a can of milk so I don't cook moi moi pudding.
Broad leaves. You can cook with foil or cellophane bags or bake in the oven with muffin cups
Salt to taste. Be careful with salt as tuna and seasoning may already have salt. Carefully Add salt last. Too much is not good for moi moi. Better with no salt than too much


Ground beans


Adding some grand soya oil


Crushing in the seasoning cubes

COOKING PROCEDURE:

First I soaked the beans for just 5 minutes, emtied into the food processor and pulsed until I saw that all the skins were off, that didn't take upto a minute.
Next I rinsed the skin off the beans, milled with the tatashe and chopped onions.
After milling, I added the seasoning cubes, coconut milk, stirred well before adding the tuna because I want to chew the chunks while eating my moi moi. Stirred briefly, checked for salt before wrapping in washed leaves.
Moi moi is wrapped in the pot, I add some drops of boiling water before turning on the heat. Moi moi is cooked by steaming, so you don't add too much water. Just check often and top water until cooking is done. Too much water at once will seep into the wrapped beans and ruin your cooking. Half cooked moi moi doesn't seat well cuz that's beans. I let this boil for 45 minutes before turning off the heat. It's still ok to let yours cook for say 50 to 60 minutes to be sure you not eating raw beans.
Enjoy your meal!


Adding some milk, if you can't find milk, you can add water to Emma milk powder and use or blend coconuts and drain out the milk for use.


Adding tuna chunks. You can cook with tuna flakes but there'll not be fish chunks to chew sha


Adding the second can of tuna


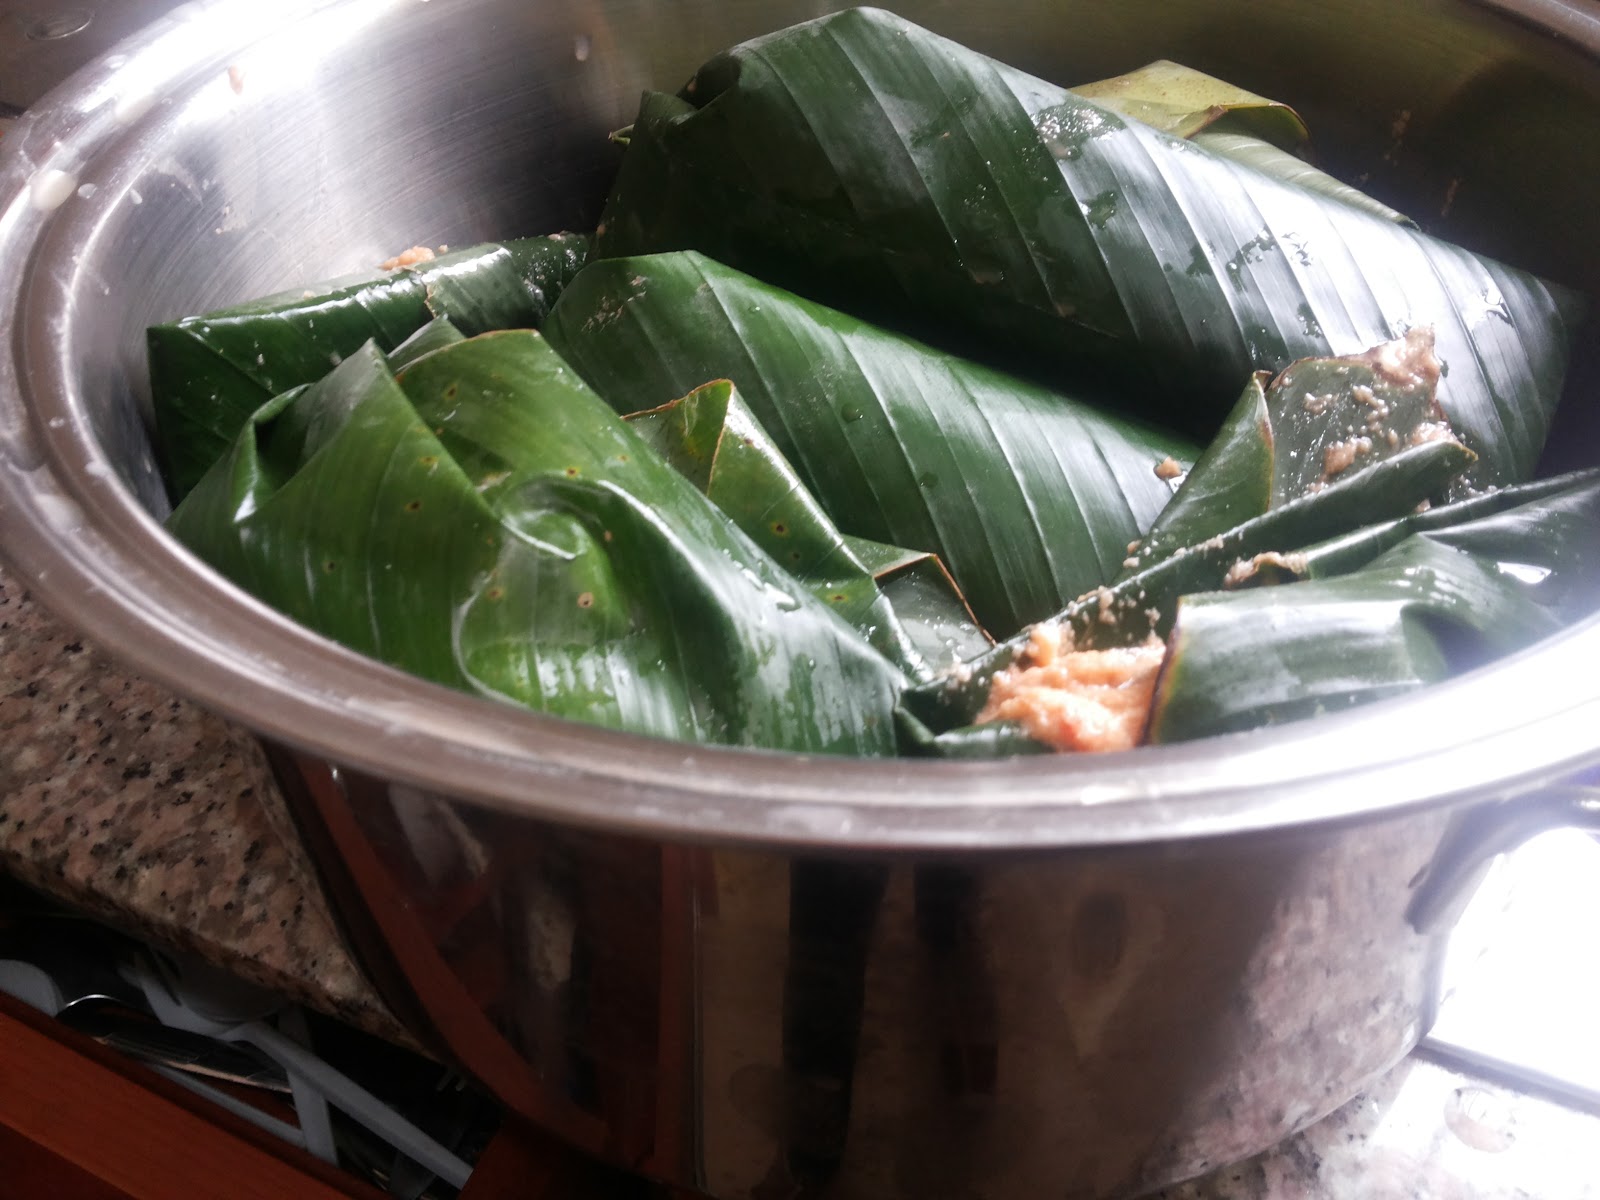
Beans is wrpaped in leaves and waiting to cook


Cooked moi moi can be served with rice or drinking garri or even eating as a main the way I enjoyed mine


Delicious and filling


This is one tuna chunk, there are more in there.
Btw, images are loading super fast these days, it's unbelievable. Thank you.

Friday, 14 October 2016

HOW TO MAKE AGIDI WITH STEW AT HOME


HOW TO MAKE AGIDI WITH STEW AT HOME


wash agidi broad leaves


broad leaves for agidi and moi moi


raw akamu/corn starch


mix corn starch with a lilttle cold water


pour mixed corn starch in a pot of salted and oiled boiling water


stir akamu briskly to prevent lumps forming


stir akamu until corn starch is cooked

Ingredients for agidi:
  • corn starch (akamu)
  • broad leaves
  • vegetable oil salt water
  • Tomato stew


folding oiled broad leaves for moi moi or agidi


fold one part of broad leaf under the other


bend one part in and pour in akamu or moi moi through the opening


bend both ends in to complete folding


hot agidi in broad leaves waiting to cool and harden


serve agidi with hot stew


agidi plain with chicken stew


agidi packaged and ready for food


agidi with stew


eat agidi mixed with stew

How To Cook Agidi:
Mix corn starch with cold water the way akamu is made
Boil some water with salt and drops of vegetable oil
Gradually pour the cold water akamu in the pot of boiling water while stirring fast enough to prevent it getting lumpy
Check for salt and thickness, if too thick, add some more water
Rub some vegetable oil on the washed broad leaves to prevent agidi sticking to the.
Fold leaves as shown in the pictures and pour in the hot agidi
wrap properly and allow to cool and harden before serving with hot stew.


agidi with Nigerian fish stew or Nigerian chicken stew


yellow agidi with tasty Nigerian stew
It is the first time my kids are eating agidi. I wanted to give it a try and see how it goes. To my surprise, they just were eating, praising and asking for more. I enjoyed it too, but the girls won't let me take more. Next time, I will definitely make a bigger quantity.
Enjoy!